
I posted these instructions over on Photrio, but thought I’d post them here as well.
In my last post, I replaced a dud capacitor on a Minolta X-9 that I was given by a friend. The Minolta X-9, otherwise known as the X-300s I believe, is similar to the X-300 and other X-series cameras, but not exactly the same. I couldn’t find specific instructions for working on this camera anywhere. Removing the bottom plate to fix the capacitor is easy, and the X-300 repair manual suffices for many other things, but the top plate is slightly different to the other X-series cameras, so I thought I’d figure out the way to remove it and put it here so others can use it. I mean, it’s really only points 1 and 2 that are different, but sometimes it helps to know things specifically. And I’m starting to think this camera is a bit underrated, once you come to terms with all the plastic.
Sorry for all the dirt in the photos, by the way.
Unless otherwise specified, all screws need a size J000 JIS screwdriver. All screws unscrew anticlockwise like normal.
Removal
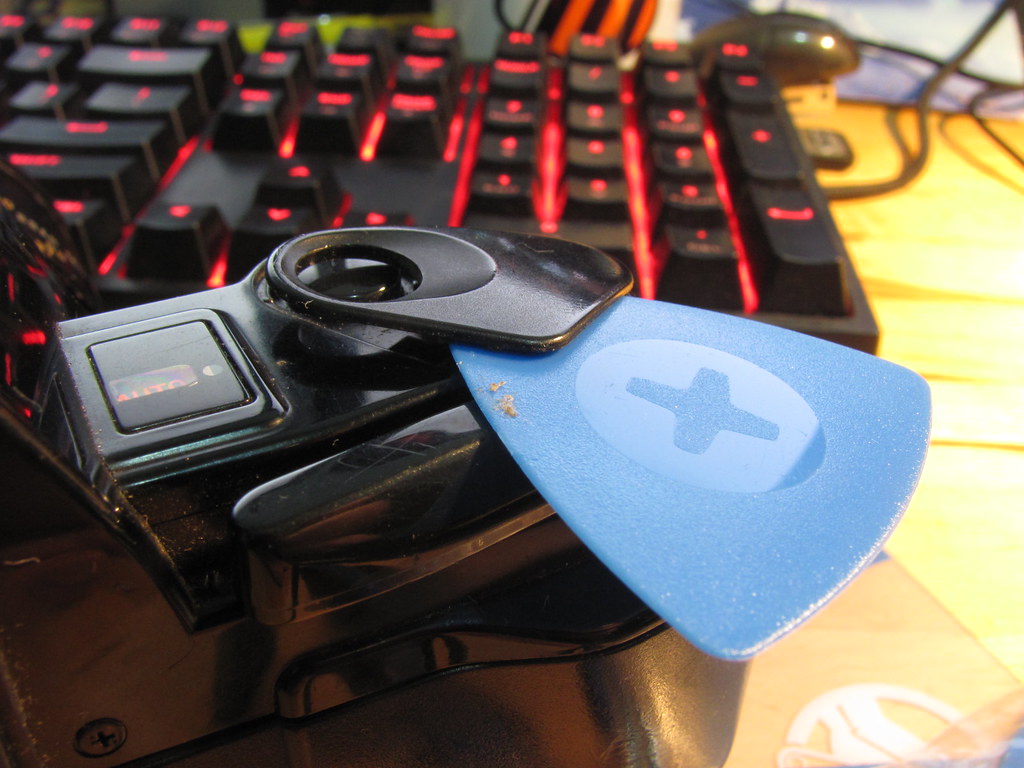
1. Remove the finger plate around the shutter button. Prize this up from the front, gently, with a thin plastic tool. You can run this around the edges, but you get more purchase near the shutter button on both sides as there’s a locator pin further down. Just don’t apply too much pressure to the bit that goes around the shutter button because it’s thin.
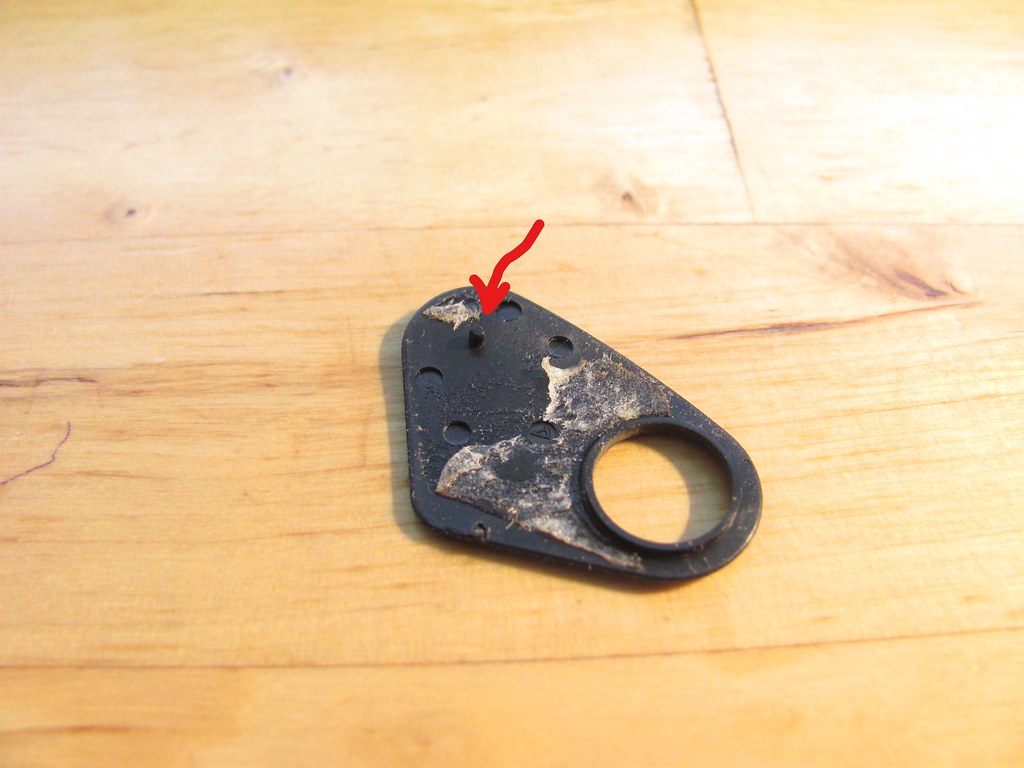
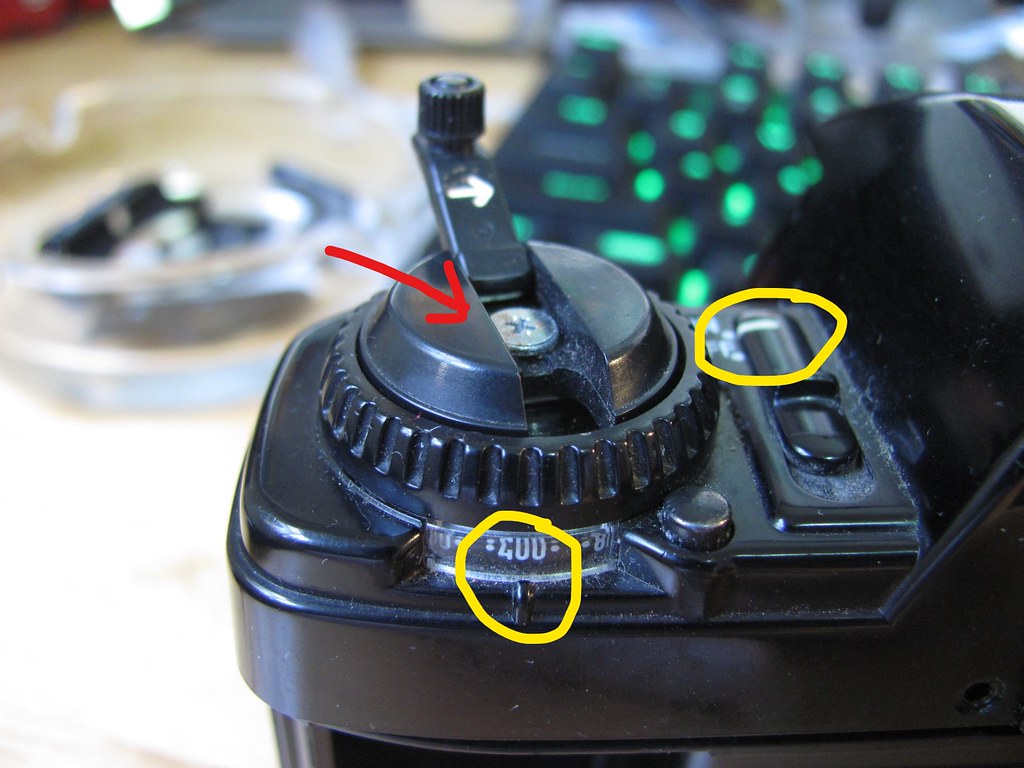
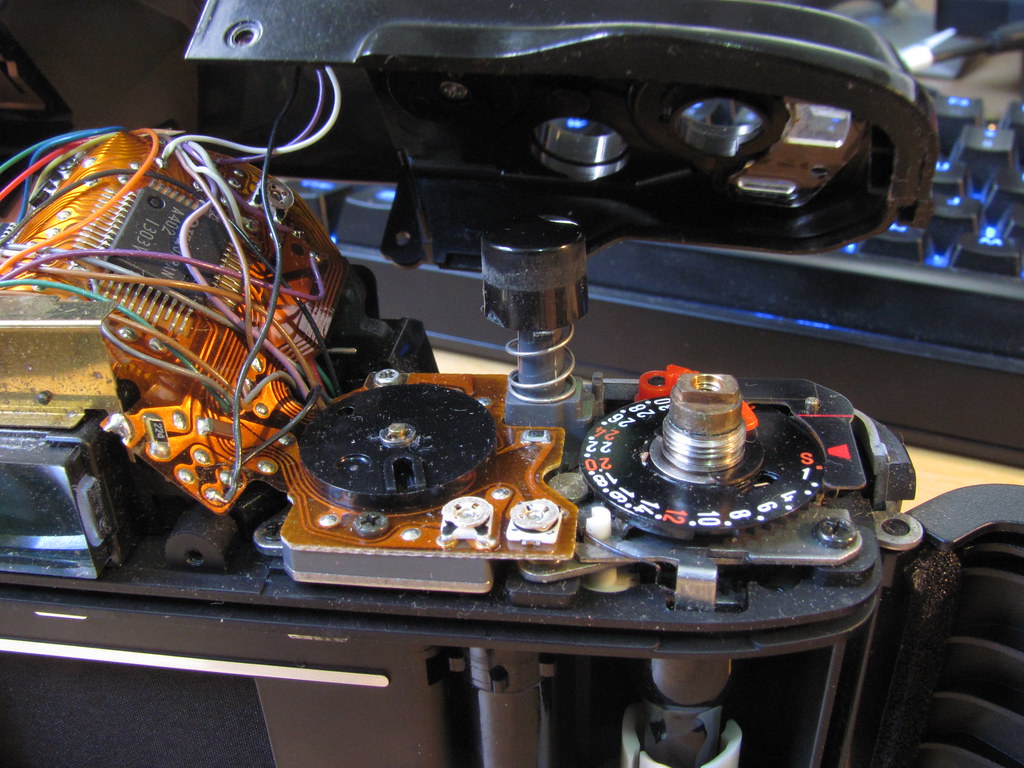
2. There are two screws below the finger plate, marked in yellow. Undo these and you can remove the cover over the shutter speed selection dial and film advance lever screw. (The red arrow is the hole the locator pin goes into.)
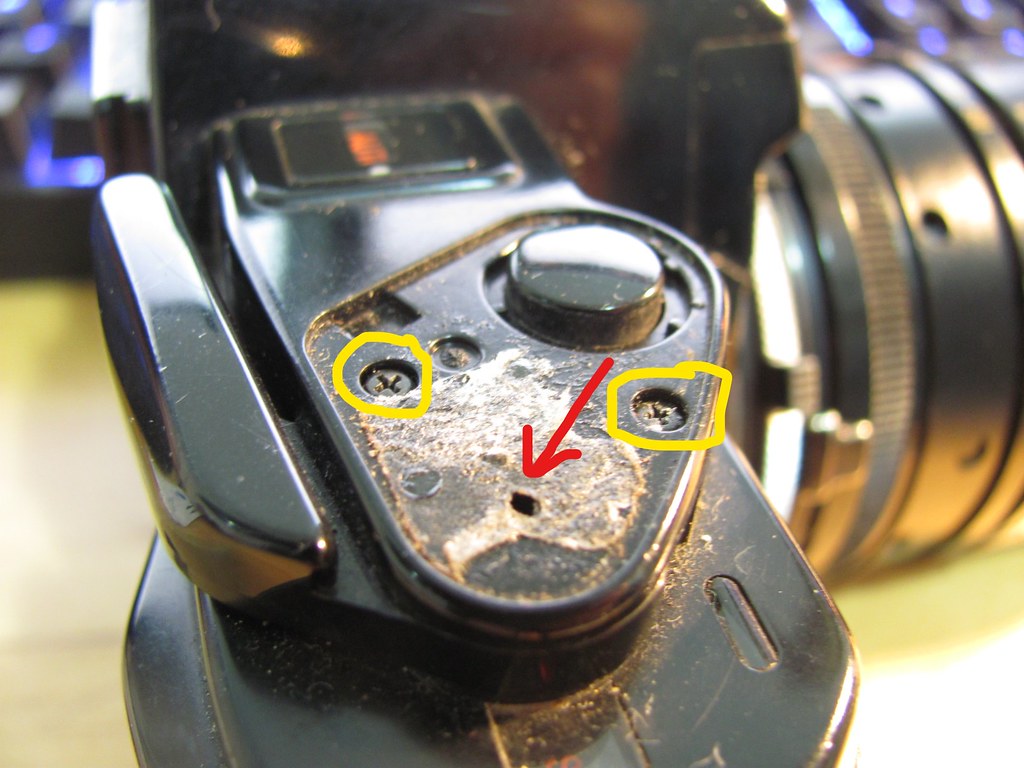
3. Remove the film advance lever screw (red arrow). This needs a size J1 screwdriver.

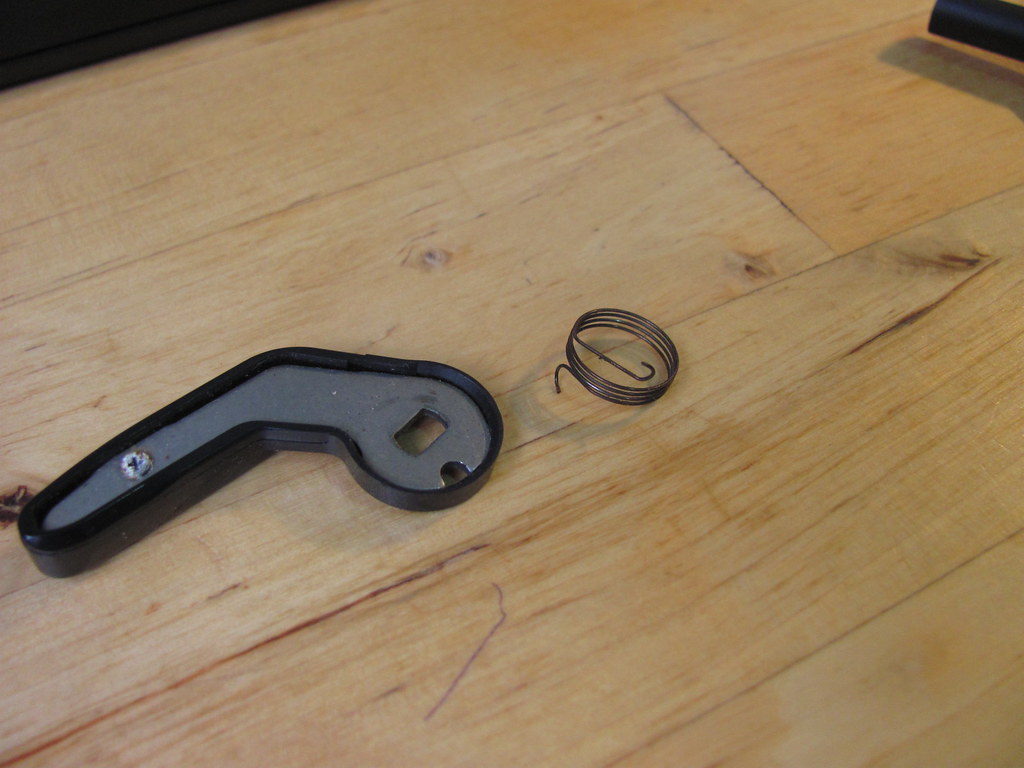
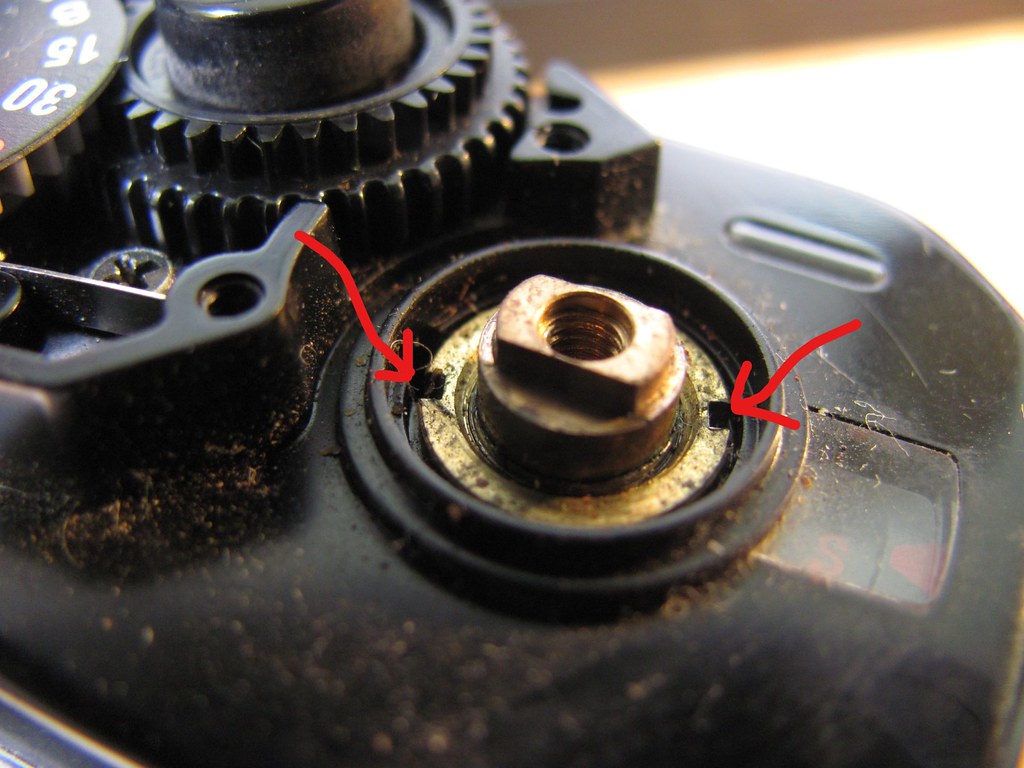
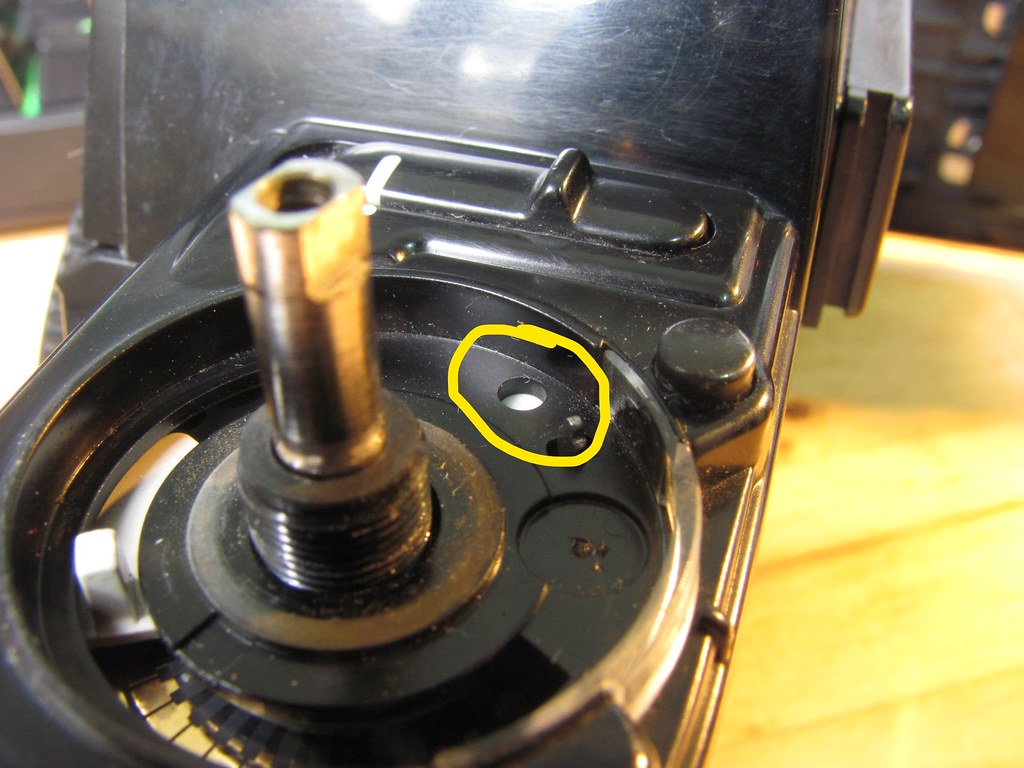
4. When you take off the film advance lever, take care about the spring beneath it. This is tricky to get back in – it needs about a 270 degree anticlockwise rotation from its resting state to line up correctly, and you’ll probably need three hands. One end goes into the hole on the edge of the advance lever, the other goes into the hole marked in the second photo.

5. Undo the nut around the film advance axle with a spanner wrench.
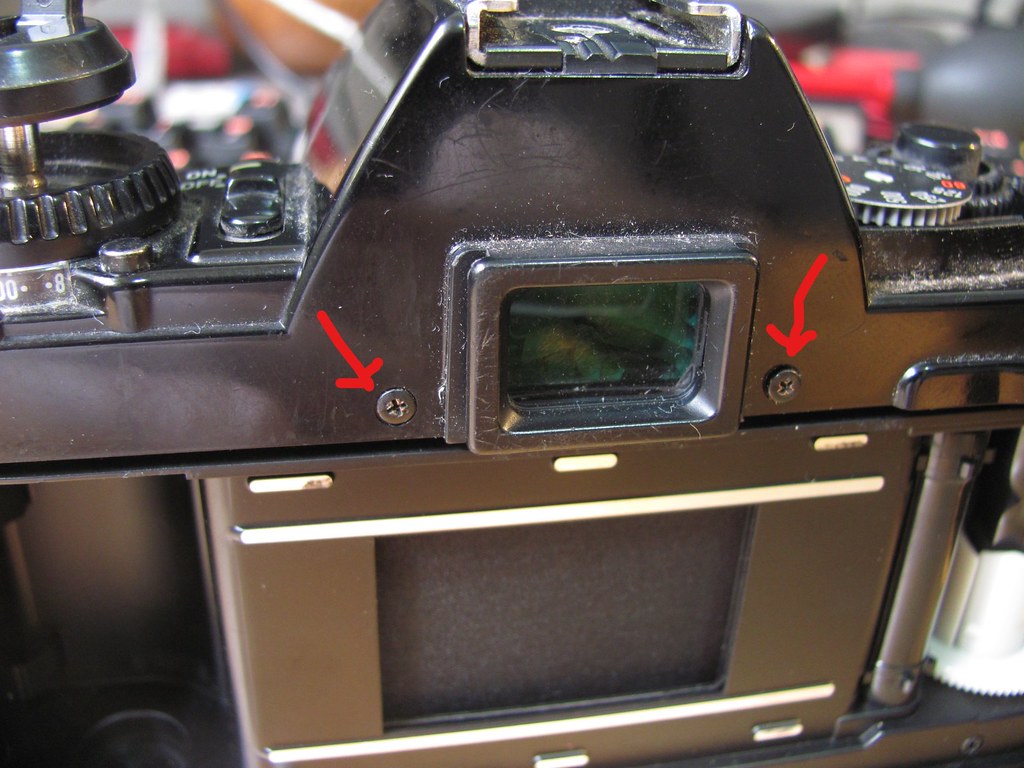
6. Take off the obvious top plate screws: two on either side of the viewfinder, one on the left end, and two on the name plate on the front.


7. Take note of the position of your ISO selector and power switch. Undo the screw on the rewind knob. This needs a size J0 screwdriver, and you’ll need to brace the other end of the rewind axle with a cloth-covered screwdriver or similar. Lift off the rewind knob.
8. Undo the plastic disk with a spanner wrench. This holds the ISO selector wheel in place. There is a circular wave spring below it. Lift off the ISO selector wheel


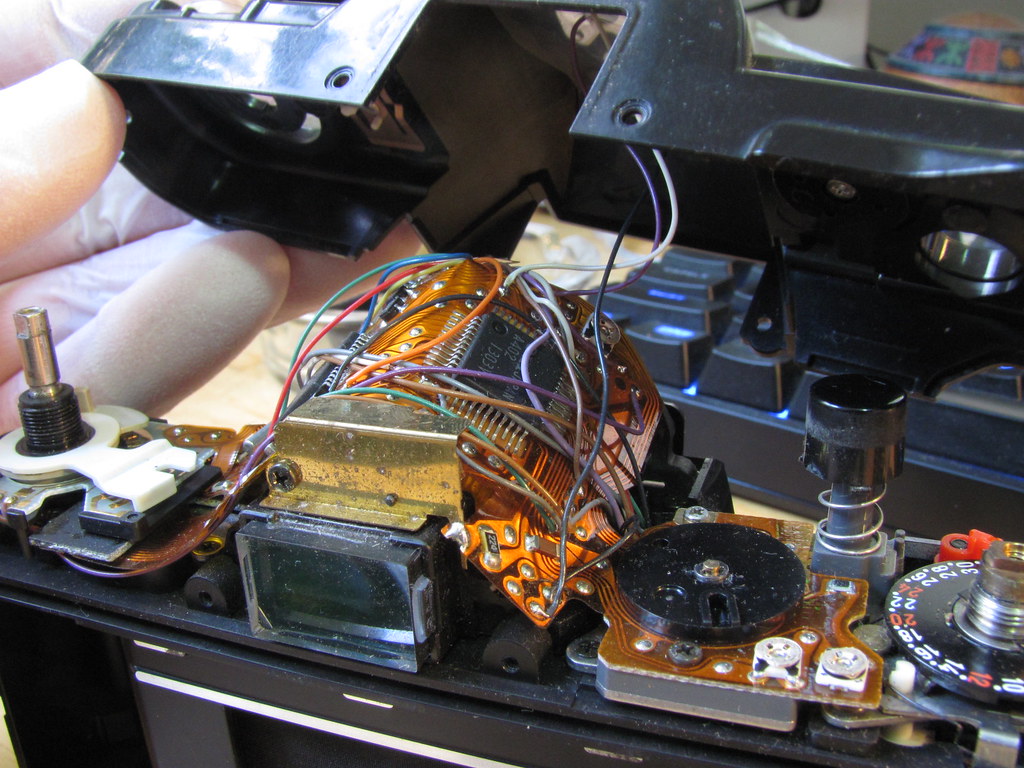
9. You can now take off the top plate. Don’t be too eager, because there are three wires leading to the hot shoe that are soldered on. Desolder them if you need to remove the top plate completely.
So that’s the top plate removed.
Reassembly
A few pointers on lining things up when reassembling:
– The shutter button has a central pole that goes into a light grey tube near the shutter speed dial. The spring goes on first. There are three tabs around the edge of the button that prevent it from fitting through the top plate, so make sure you put this back before the top plate goes on.

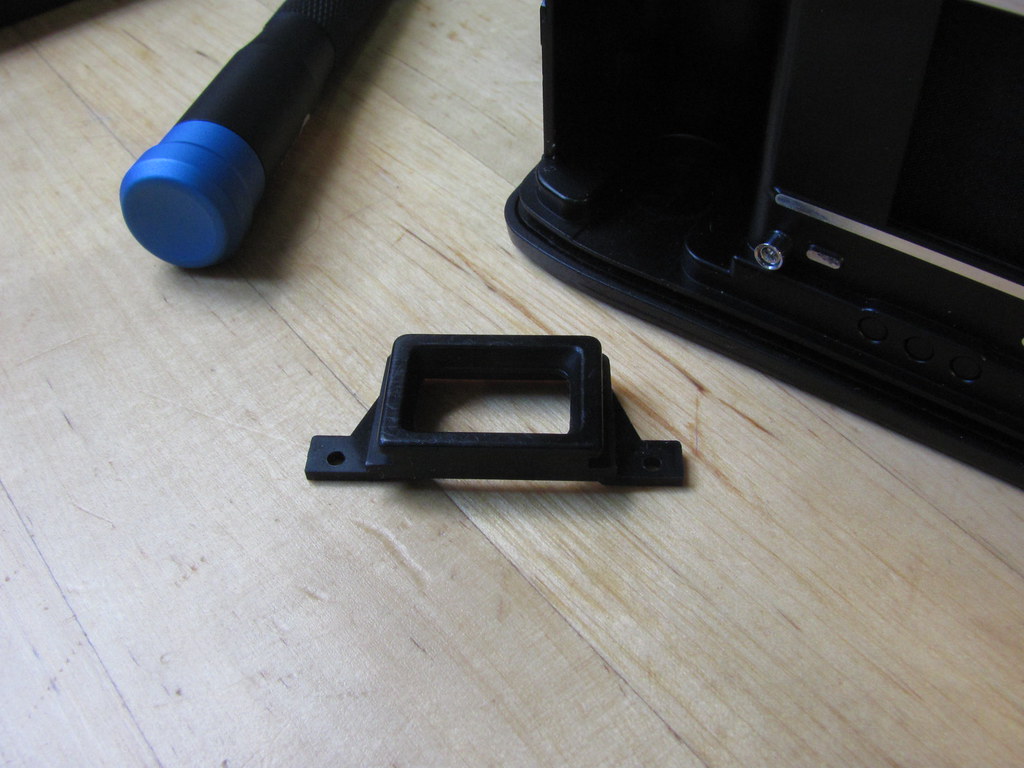
– The viewfinder surround is only held in by the top plate screws on either side of it. There are two channels around its edge – the outermost is for attaching an eyecup or some such, and the innermost sits into the top plate. When sitting correctly in the top plate, the tabs with the screw holes fit between the top plate and the camera body. You might need some extra arms to keep this in place while also lining up the shutter button and power switch when you’re putting the top plate back on.

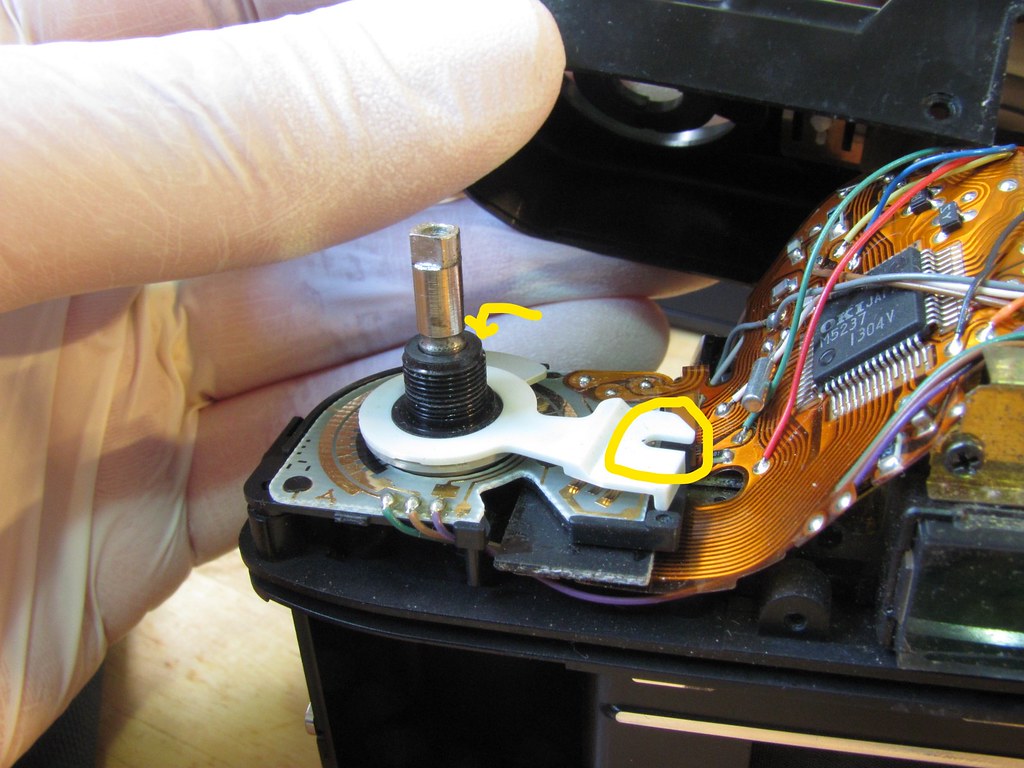
– The power switch actuator is the white lever near the rewind pole. The power switch interfaces with the U-shaped indentation at the end of the lever. (The ISO interface pole is behind the axle – just ignore that arrow.)
– When the top plate is back on, but before you replace the ISO selector wheel, you can tell if the power switch is interfacing properly by viewing the switch through a hole in the top plate.
Switch set to Off: all white (lever is directly below the hole)
Switch set to On: half white half empty (looking at the edge of the lever through the hole)

– The ISO selector wheel has a hole on its underside that interfaces with the grey pole you can see at the far left of the two pictures above.
Leave a Reply